Posts Tagged ‘Craft’

We Have Polymorph!

Polymorph from RobotShop

Polymorph

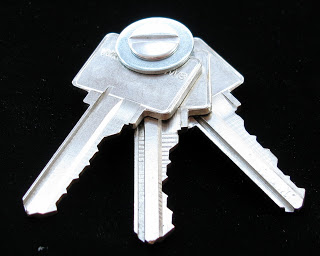
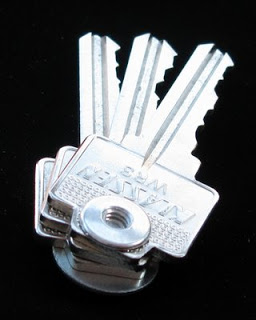
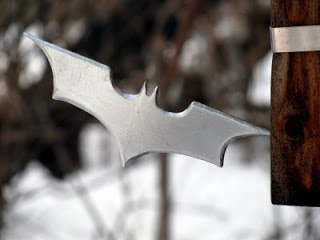
Polymorph (or polycaprolactone) is a great nylon-like material that can be melted in hot water and manipulated with bare hands in order to model it into a desired shape. It is very useful when making quick (and not so quick) prototypes and custom parts for a project since it can be easily manipulated and molded and becomes very strong once it cools down.

Ring opening polymerization of ε-caprolactone to polycaprolactone

Ring opening polymerization of ε-caprolactone to polycaprolactone

Unfortunately, this great material was not available for purchase in Canada (or at least not to my knowledge) and had to be ordered from the US wich was rather expensive in shipping costs.

All this has lately changed since RobotShop, the Canadian based robot part distributor, included Polymorph into their catalogue. Now Canadians can buy 1 kg of polymorph for roughly 44 CAD and have it quickly and cheaply delivered to their doorstep.

I bought some polymorph for my brother’s birthday and we experimented with it as shown in the pictures below. Now, that Canada has polymorph, let all the Canadian go crazy and build awesome white (or coloured) stuff.

Polymorph + hot water

Polymorph + hot water

Hot polymorph

Hot polymorph

Simple Precision-Screwdriver Holder

Workshop wall

Workshop wall

This is a very simple and quick hack that anybody can do. The objective is to build a holder that will keep all the precision screwdrivers in one place and facilitate the access to them (i.e. it should be easy to see which one is which and they should be easy to take).

Materials

  • A plastic container cap (I love caps)
  • That’s it, you do not need anything else

Tools

  • Drill or strong scissors
  • Precision screwdrivers
  • A nail (maybe)

Doing it

Screwdriver Holder

Screwdriver Holder

  1. Drill or cut a big hole on the top of the cap. This hole will be used to suspend the screwdriver holder.
  2. Punch in the Screwdrivers in the rim of the cap. If you do not trust your screwdrivers to pierce your cap, you may use a nail. Keep in mind that the screwdrivers have to be very snug in the holes since they are only being held-in by friction.
  3. Celebrate! you are done.

Tux Laptop Sleeve

The only defect of my new Vostro 1320 is that it did not come with a sleeve as the Eee PC does. Since I would like to protect the laptop from scratched and dust, a sleeve is absolutely required. So, from my perspective, the only solution to this problem was to do one myself.

I had an old blazer from my girlfriend’s father that was too oddly shaped to fit anybody I know, but I liked the fabric and I thought that it could become a very nice laptop sleeve. The only problem about that idea is that I do not know how to sew. Of course, not knowing how to do something, has never stopped me before and is not likely to stop me any time soon.

Tux laptop Sleeve

Tux laptop Sleeve

Materials

  • Old blazer
  • Zipper
  • Fabric Marker (not required but rather cool)

Doing it

Making this was surprisingly simple since I expected great difficulties coming from the sewing part. I decided to go with a design as simple as possible and to minimize the number of stitches, this resulted in making something extraordinary similar to a simple cousin.

I simply cut a rectangle big enough so that, when folded in half, it could contain my laptop from the blazer and then stitched the bottom and the side of the resulting pouch. Then, I added a zipper to the top. I used zigzag stitches all the time and, of course, I sewed the sleeve from the inside.

Also, I chose a section of the blazed which had an internal and external pocked so I could use them to carry some extra stuff. Furthermore, I kept the (synthetic?) silk interior lining that looks better than the bare exterior wool.

Finally, I wanted to ad some decorations to the pouch so I decided to use my brother’s fabric markers (he is using for making pretty cool disguises) to ad the word “Linux” to one side of the sleeve. Then I asked him (since he is much more talented than me at drawing (and since I am very lazy) to draw Tux on the back. To achieve that he used a stencil made from the image below that I got from the internet.

Tux Stencil

Tux Stencil

I think the final result is pretty cool and very useful. The pockets are great, I can put all of the things that I usually need to carry with my laptop (e.g. mouse, headphones, USB keys) without any troubles. The only thing missing is perhaps a handle that I may add in the future.

My Brother Painting Tux

My Brother Painting Tux

Compact Keychain 2.0

The first compact keychain was a great success among my readers and became very popular very rapidly.

Now that my life has become slightly more complex, I need an extra key (and also, I’ve lost my original keychain) so I had to build another one. This exposes the most obvious fault of the design: no keys can be added or removed.

I was at the hardware store and I came across some Chicago screws, Immediately I remembered all of my readers suggesting using such screws for the keychain. Although I had seem Chicago screws previous to these suggestions, it is only thanks to my readers that now I know how they are called.

So, I decided to get some ¼” screws since they fit pretty nicely three keys. Since I had some extra space, I added a large washer. I can use this washer as a flat head screw driver (that even works on some Philips screws) or a bottle cap opener.

I was planning on using some thread lock in order to prevent the screw from loosen itself but it was not necessary. Also, for some keys, it may be required to enlarge their hole so the screw can fit in nicely.

Finally, while going trough a few jars filled with old keys I got form freecycle, I found an ancestor to my compact keychain. This old version features a custom Chicago screw and a leather jacket that covers the keys.

The Batrang

I always wanted to have a batrang since I have always liked Batman a lot. So, I decided to build one now that they have become much simpler than before in the latest Batman films.

Materials

  • A chunk of steel

The tools I used

  • Various files
  • A Jigsaw
  • A hacksaw
  • A Dremel with a heavy duty cutting blade
  • A grinder
  • A sharpening stone
  • Various grit sandpaper
  • A steel wool sponge

I used the pattern below, extracted from a film poster (or something like that) and obtained by accentuating the contrast and cutting off colours until the shape was clean enough. I printed it so it measures around 3.5 cm by 12 cm.

Then, I overlaid the printed and cut shape on the metal, traced it out with a marker and cut it roughly with the hack saw and the jigsaw (the jigsaw is not mine so I mainly used the hack saw). The next step was to grind and file the metal until it had the right shape. The lasts steps where to polish it and sharpen it so it could actually cut. I prefered making it sharp than polishing, as a result, it now serves as a multi-purpose knife or letter opener. I put a magnet on it so I can stick it to other metal surfaces such as a fridge.
As my readers may have guessed, I always prefer function instead of looks.

I may try to temper it to make it stronger and more durable.

Return top

Welcome!

Here you will find my DIY projects, Robotic hacks, Nao 1337 videos, and more! Have questions about a project? Leave a comment!